Configuring Proxy Server Settings in the Firefox Browser
You can download these instructions as a PDF file here (in German).
The following describes the settings that must be made to configure the Firefox browser for use with the UHH proxy server. Please proceed as follows:
- Start the Firefox browser.
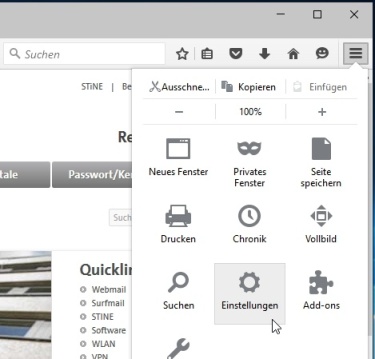
- Click on the menu icon in the top right corner and select “Settings” (Fig. 1a).
 Fig. 1a: Open settings page |
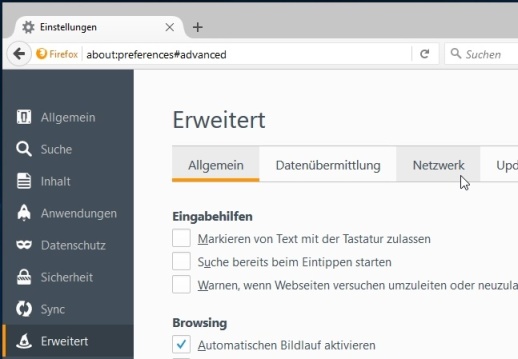
 Fig. 1b: Select network settings |
-
Select “Advanced” in the left navigation column and then select the ‘Network’ tab at the top of the page that appears (Fig. 1b). Alternatively, you can access the advanced settings page of the Firefox browser by entering “about:preferences#advanced” and pressing the Enter key.
-
After selecting the “Settings...” button on the right side of the network settings page, a new window for the connection settings will open.
-
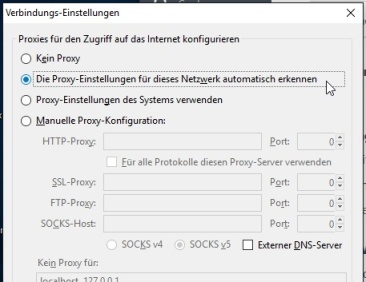
Select the entry “Automatically detect proxy settings for this network” and confirm with the “OK” button (Fig. 2a).
 Fig. 2a: Authomatic configuration |
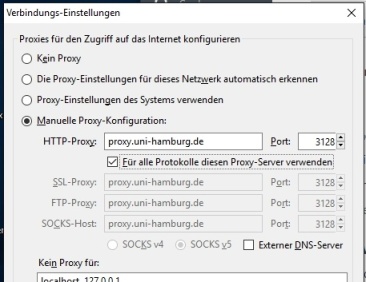
 Fig. 2b: Manual configuration |
As an alternative to automatic configuration of the settings, you can also configure them manually.
- To do this, select the options “Manual proxy configuration:” and “Use this proxy server for all protocols” and enter “proxy.uni-hamburg.de” as the address and “3128” as the port (Fig. 2b).
