
How to use Zoom in a meeting or webinar
This section explains the various controls available to you in the zoom desktop app during a zoom meeting.
Most of the controls described here are also available in zoom webinars. Any differences between meetings and webinars are explained in the respective sections.
Unless otherwise noted, all the controls described here can be found during a meeting or webinar in the menu bar at the bottom of the zoom client window. You can reorder the menu items there using drag-and-drop. Hidden menu items and the option to restore the default layout can be found in the Submenu More.
Controls
Audio
You can mute or unmute yourself using the microphone icon.
You can change your audio settings (e.g., the speaker or microphone you're using, or the input or output volume) using the small arrow to the right of the microphone icon. For more information on the available audio settings, visit the manufacturer’s support page.
In webinars, regular participants are always muted.
Video
Use the Video (camera) icon to turn your video on or off. Hosts can prevent individual participants or all participants from sharing their video.
You can also click the small arrow next to the Video button to adjust your video settings, such as selecting a different camera, applying a video filter, or choosing a virtual background.
In webinars, regular participants can join without video only.
Chat
 Use the Chat button (speech bubble icon) to show or hide the meeting or webinar chat. In a meeting, you can exchange text messages and file attachments with all participants or with individual participants. In a webinar, you can chat with the hosts and panelists, depending on the chat settings configured for the webinar.
For scheduled recurring meetings, you can enable Continuous Meeting Chat. This creates a dedicated group chat for the meeting, and all invited participants are automatically added. The group chat remains available after a meeting has ended, allowing participants to continue the conversation. Messages exchanged during previous sessions are retained in the chat history and remain available throughout the lifetime of the recurring meeting.
You can also use Zoom Team Chat independently of meetings or webinars to communicate with other members of the university. For detailed instructions on using Zoom Team Chat, please refer to the Zoom Support documentation.
React
Use the React (heart) icon  to send emoji reactions, which will briefly appear on your video tile.
If your camera is turned on, you can also enable Automatic Hand Gesture Recognition, allowing the app to detect hand gestures and trigger the corresponding reactions automatically.
Raise hand
 Use the Raise Hand icon to virtually raise your hand, for example to indicate that you would like to speak. A hand icon will then be displayed on your video tile and next to your name in the participant list until you or a host/co-host lowers your virtual hand.
To lower your hand, right-click the video tile showing the raised hand and select Lower Hand.
In Gallery View, participants with a raised virtual hand are displayed closer to the beginning or top of the gallery.
If Automatic Hand Gesture Recognition is enabled, you can also raise and lower your virtual hand using hand gestures detected by your camera.
Share

Use the Share button to share different types of content with participants in a meeting or webinar. When you click the button, the Share dialog opens, allowing you to choose what you want to share.
Desktop
You can share an entire desktop so that other participants can follow your actions in real time.
Application Windows
Instead of sharing your entire desktop, you can share only a specific application window.
Portion of Screen
This option is available under the Advanced tab. It allows you to share only a selected area of your screen.
Whiteboard (Classic)
This option is available under the Documents or Files tab. It opens a classic whiteboard that you can use for drawing and adding content during the session. Other participants can export the whiteboard, including its contents, as a file for their own use. This feature should not be confused with Zoom's new collaborative Whiteboards.
Settings
Click the arrow next to the Share button in the toolbar to open and configure the sharing settings, such as full-screen mode, window sharing, and other sharing options.
More
|
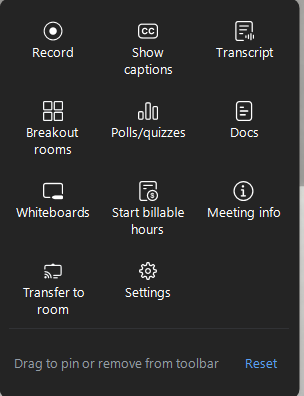
Here you’ll find all controls that are not displayed directly in the toolbar at the bottom of the window. By default, this includes following items:
At the bottom of this submenu, you can also click Reset to restore the default arrangement of the menu items. |
 |
 By clicking the "End" button, you can leave the ongoing
 Meeting Information
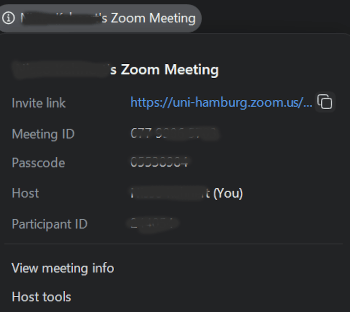
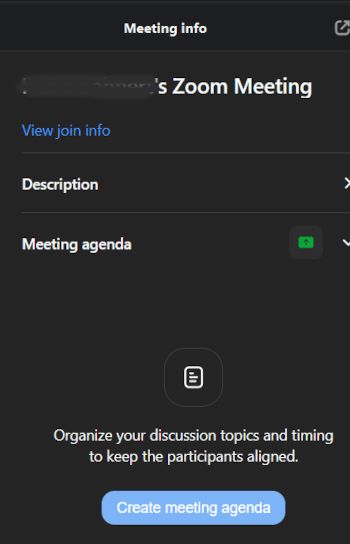
By clicking the "ⓘ Zoom Meeting” button at the top of the menu with the name of your Zoom meeting (in the Screenshot "ⓘ Somebody's Zoom Meeting"), you can view the join information (invite link, meeting ID, passcode, etc.), the link to the full meeting info, and, if you are the meeting host, to the host tools.
Meeting Agenda
|
As the host, you can create an agenda for your meeting. This is then saved as a Zoom document in the cloud and can be viewed by meeting participants. Using the “Share” button in the agenda’s title bar, you can also grant meeting participants editing or commenting rights for the agenda. Additionally, you can grant access to the agenda to all members of the University of Hamburg or to the general public. Outside of the meeting, the link to the agenda is required to access it. |
 |
Transfer to room
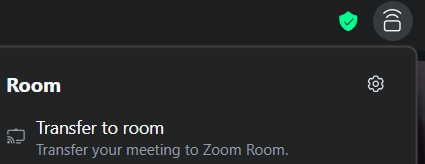
You can stream the meeting to a Zoom Rooms device in a conference room by entering the room code displayed on the room device.
Host-Tools
 The shield button gives you access to several features for moderating the meeting:
Lock MeetingWhen this option is enabled, no one can join the meeting. Enable Waiting RoomWhen this option is enabled, Hide Profile PicturesWhen this option is enabled, the names or initials of the meeting participants are displayed in the video tiles and in the participant list instead of their profile pictures. |
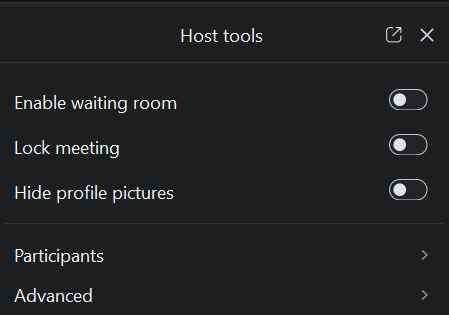 |
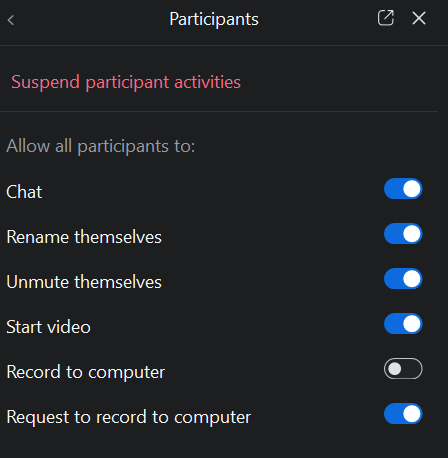
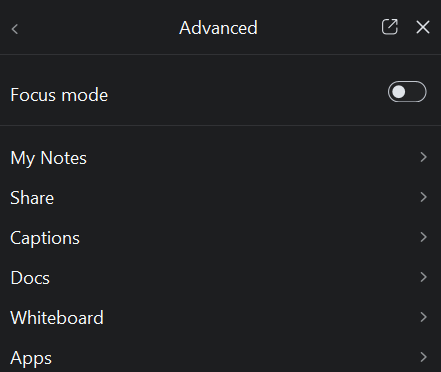
Additional features can be found under the “Participants” and “Advanced” submenus.
 |
 |
Whiteboards
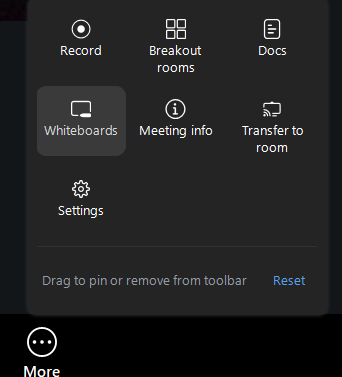 Using the “More” -> “Whiteboards”, you can create, manage, and share whiteboards. On a whiteboard, you can draw, write, and add PDF files and images.
For more information about this feature, please visit Manufacturer Support